The End Sale Period function is used to consolidate the ‘End of Shift’ from each POS Terminal. It is possible if using multi-sites to enter different Accounts for each site. These will however only be exported from the terminal with the Xero module installed.
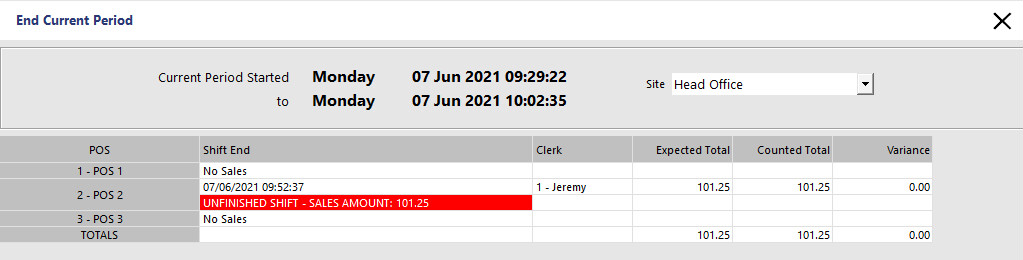
To End the Sale Period, go to Accounting > End Sales Period.
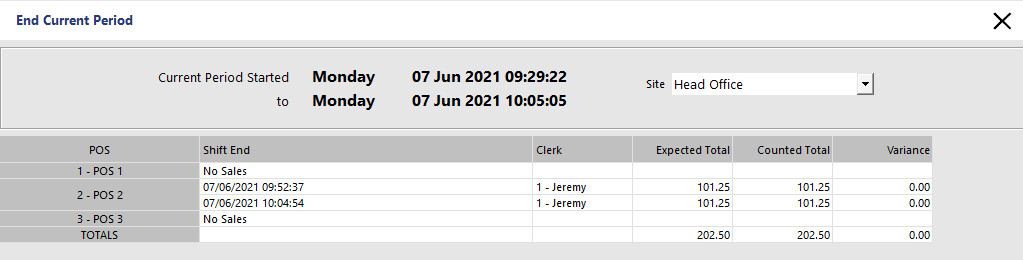
All the End of Shifts performed at each POS Terminal will be displayed within the site you have selected.
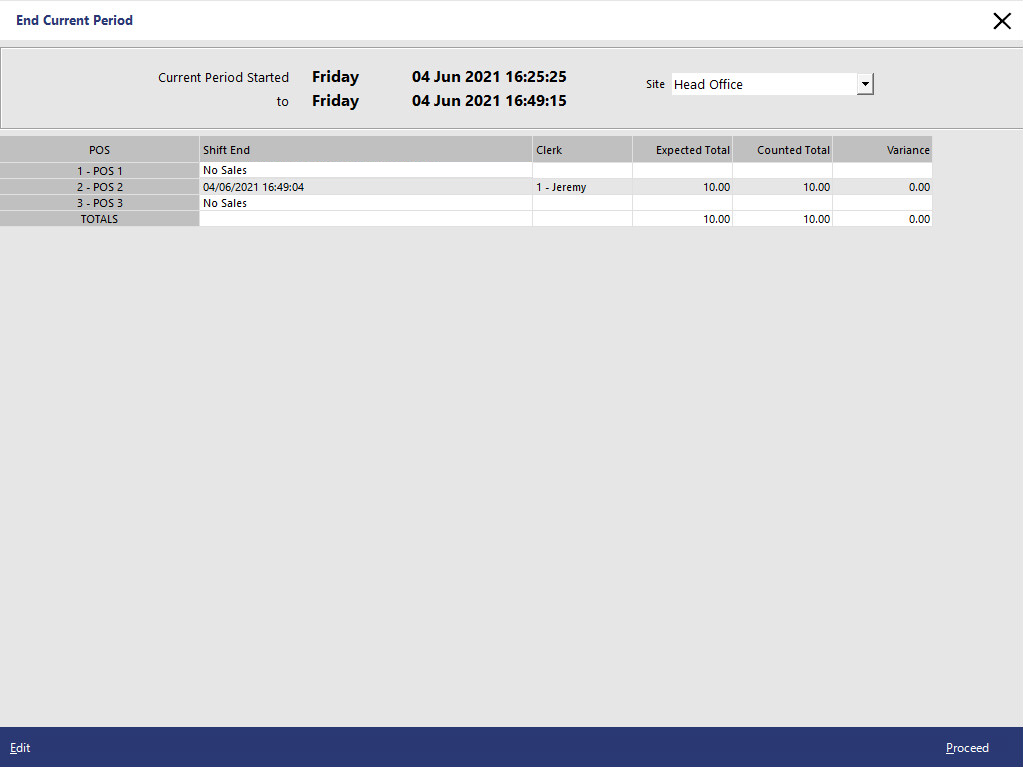
You have the option to edit the End of Shift figures for each individual End of Shift before you proceed to the next step. You can enter the counted total for each cash drawer at this point, or alternatively you can proceed to the next step and count all the money from each cash drawer together. Press Proceed to end the current sales period.
This scenario is where a business uses only one cash drawer float per terminal per day, and at the end of day, the End Sale Period function is performed.
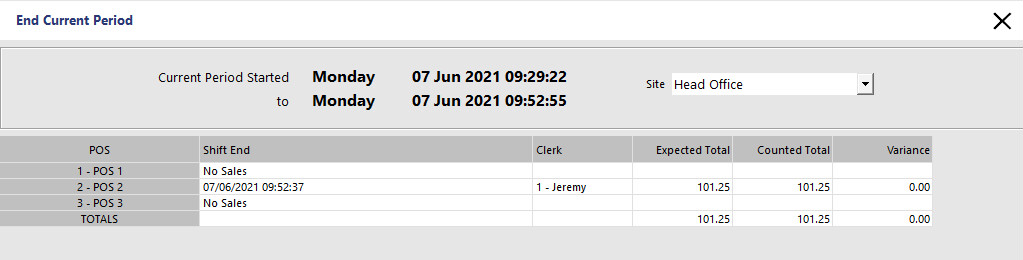
This scenario is where a POS Terminal may have more than one End of Shift performed within one day, in which you will be required to reconcile each cash drawer float.
If an End of Shift has not been completed, and you perform an End Sales Period, the sales data for this unfinished shift will not be added to the current End Sale Period.
Businesses that operate over the weekend, but do not do any banking or reconciling of cash drawer floats can either End Sale Period for the whole weekend sales OR perform an End Sale Period at the end of each day, and reconcile their combined End of Shift totals after the weekend.
Performing one End Sale Period per day would allow you to send the reconciled banking data to Xero with each day separated.
The Sales Reconciliation function is the final step before sending sales and banking data to Xero.
Go to Accounting > Sales Reconciliation.
Each Sales Reconciliation is shown line by line. An Audit number is given to each Sales Reconciliation and is sent to Xero as the journal reference number.
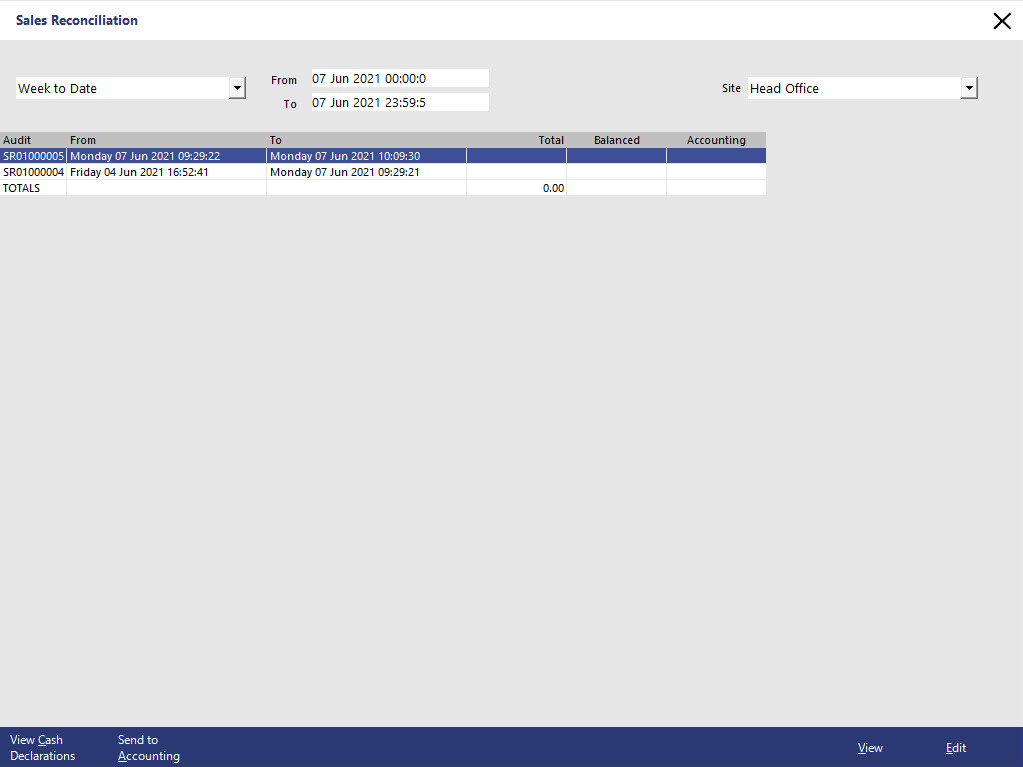
If you are a Multi-Site Business and you have each site connected via a ‘VPN’ Network (Virtual Private Network over the Internet) it is possible to perform Sales Reconciliations for each Site.
To balance the Sales Reconciliation, highlight the Sales Reconciliation and press Edit. The Sales Reconciliation must balance before Idealpos allows you to send to Xero.
If there is a variance in between the sales total and the counted cash drawer float, enter either a positive or negative variance amount in the variance box.
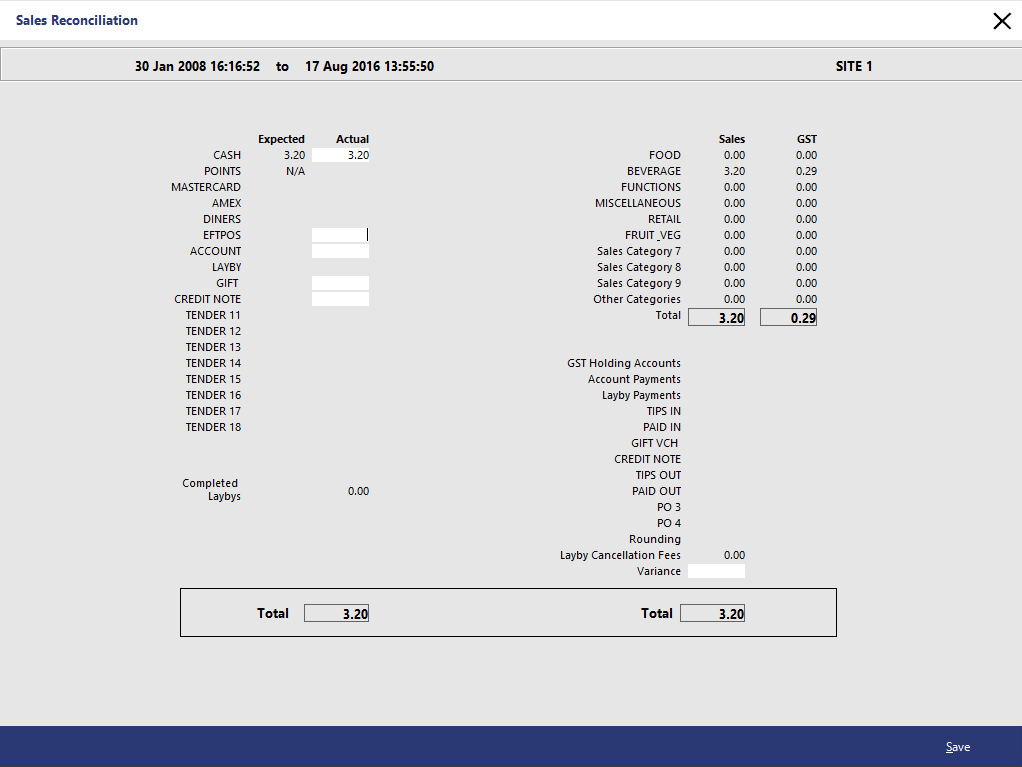
Once Sales reconciliations are balanced, a tick will appear in the balanced column and the Sale Reconciliation is now ready to send to Xero. Press ‘Send to Accounting’ to send to Xero.
If the Transfer is successful, a tick will appear in the accounting column, and the data has now been sent to Xero.

To view the transferred data in Xero, click on Contacts > Customers > and select your POS Debtor.
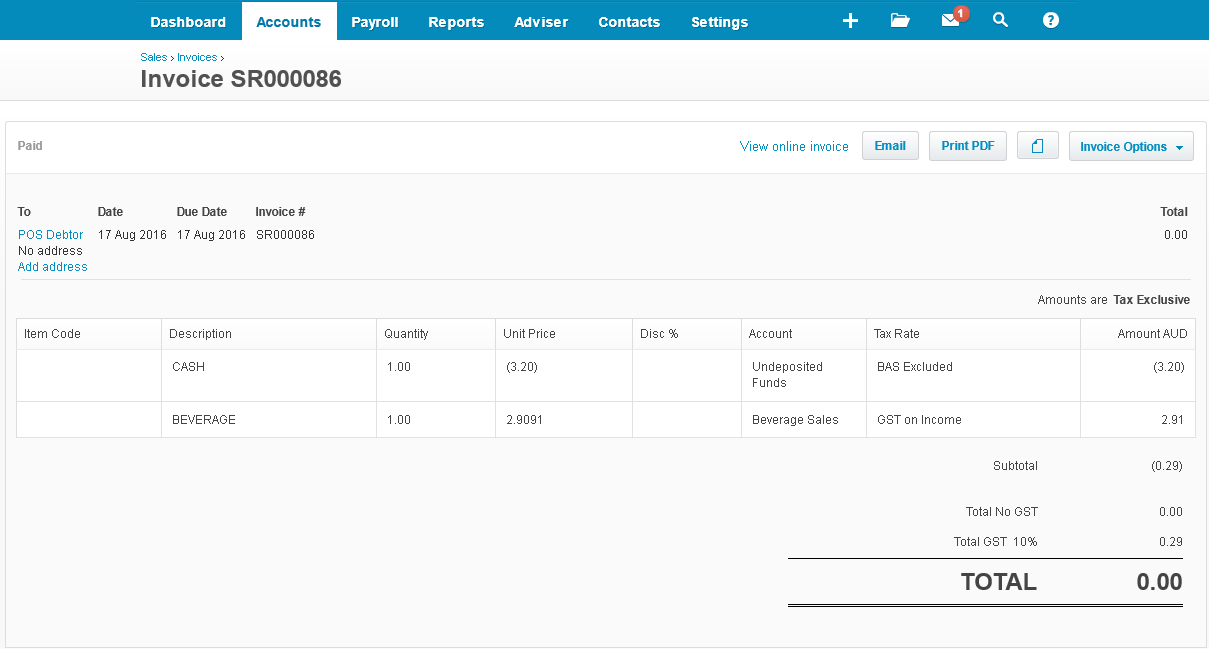
The transferred data has been sent to Xero as an Invoice Paid. Click on the Number beside the date to view the contents of the Invoice. The Invoice Number will match Idealpos’ Sales Reconciliation number (E.G SR000086).